This mod is to externalise the Xbox 360s FATs internal disc drive into a Xbox 360 HD-DVD drive enclosure. So that I can either:
- Have an extra CPU heatsink on the GPU while at the same time retaining the ability to play or rip game discs on my JTAG Xbox 360s.
- Use the drive as an 0800 ripping drive.
PERCENT COMPLETE
100%
TASKS
Complete:
Prepare the Xbox 360 disc drive
Create the Xbox 360 Internal to external adapter plate
Create and build the HD-DVD enclosure replacement interface PCB design
Not Complete:
XBOX 360:
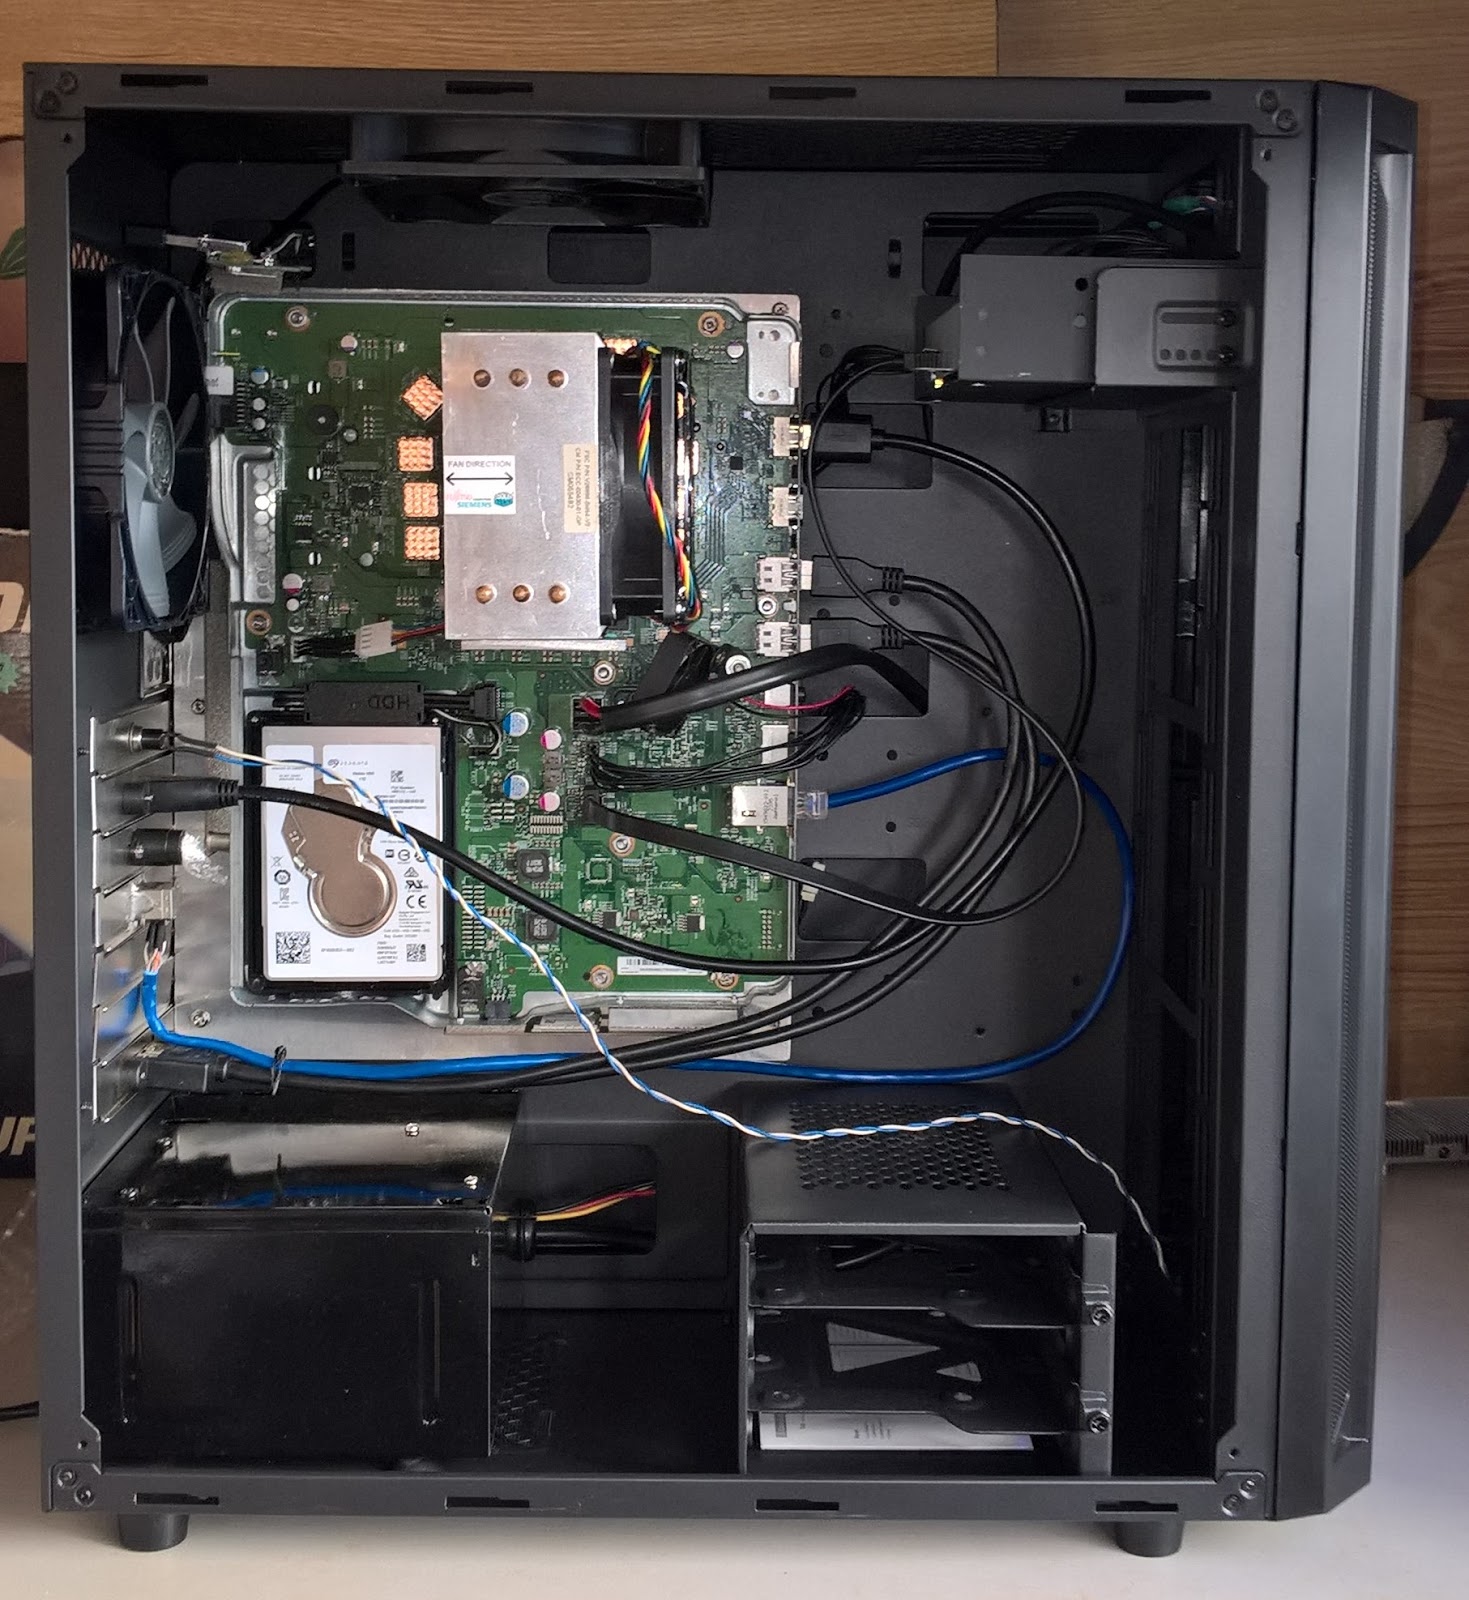
The internal to external connections are accessible all of the time from the disc drive tray area.

Internal to external Bracket:
In the place of the of the disc drive is a bracket that has the eject switch, external drive power connector and SATA port. The bracket metal is from the side of a PC power supply that has been cut off and down to what you see. I drilled, cut and filed the ports into the bracket. It mounts using screws going through holes that already exist in the Xbox 360 motherboard metal tray


Internal Cables:
The internal to external power cable is from an original Xbox as it is the perfect length. It has been rewired to suite my needs. The internal to external SATA cable ends are an eSATA bracket mount to regular SATA end. The eject button has been wired directly to the eject switch on the Xbox 360 motherboard.

Xbox 360 disc drive power pinout.

100%
TASKS
Complete:
Prepare the Xbox 360 disc drive
Create the Xbox 360 Internal to external adapter plate
Create and build the HD-DVD enclosure replacement interface PCB design
Create the cables
Not Complete:
XBOX 360:
The internal to external connections are accessible all of the time from the disc drive tray area.

Internal to external Bracket:
In the place of the of the disc drive is a bracket that has the eject switch, external drive power connector and SATA port. The bracket metal is from the side of a PC power supply that has been cut off and down to what you see. I drilled, cut and filed the ports into the bracket. It mounts using screws going through holes that already exist in the Xbox 360 motherboard metal tray


Internal Cables:
The internal to external power cable is from an original Xbox as it is the perfect length. It has been rewired to suite my needs. The internal to external SATA cable ends are an eSATA bracket mount to regular SATA end. The eject button has been wired directly to the eject switch on the Xbox 360 motherboard.

Xbox 360 disc drive power pinout.

XBOX 360 DISC DRIVE:
Modifications:

TIP: Get a hacksaw, lay the blade flat against one side of the drive front and back legs outer metal where the plastic legs go through and slide hacksaw back and forward to cut off two plastic legs off perfectly even with the metal that the legs go through. Then do the other sides two legs.
Drive Tray Facia:
To make the HD-DVD drive tray facia fit on the Xbox 360 Lite-On disc dive a piece of the tray that sticks out must be removed so that the drive front around that area is flat. As seen outlined in red in the following pictures.
Before.
After.

Before.

After.

XBOX 360 HD-DVD DRIVE:
PICTURES

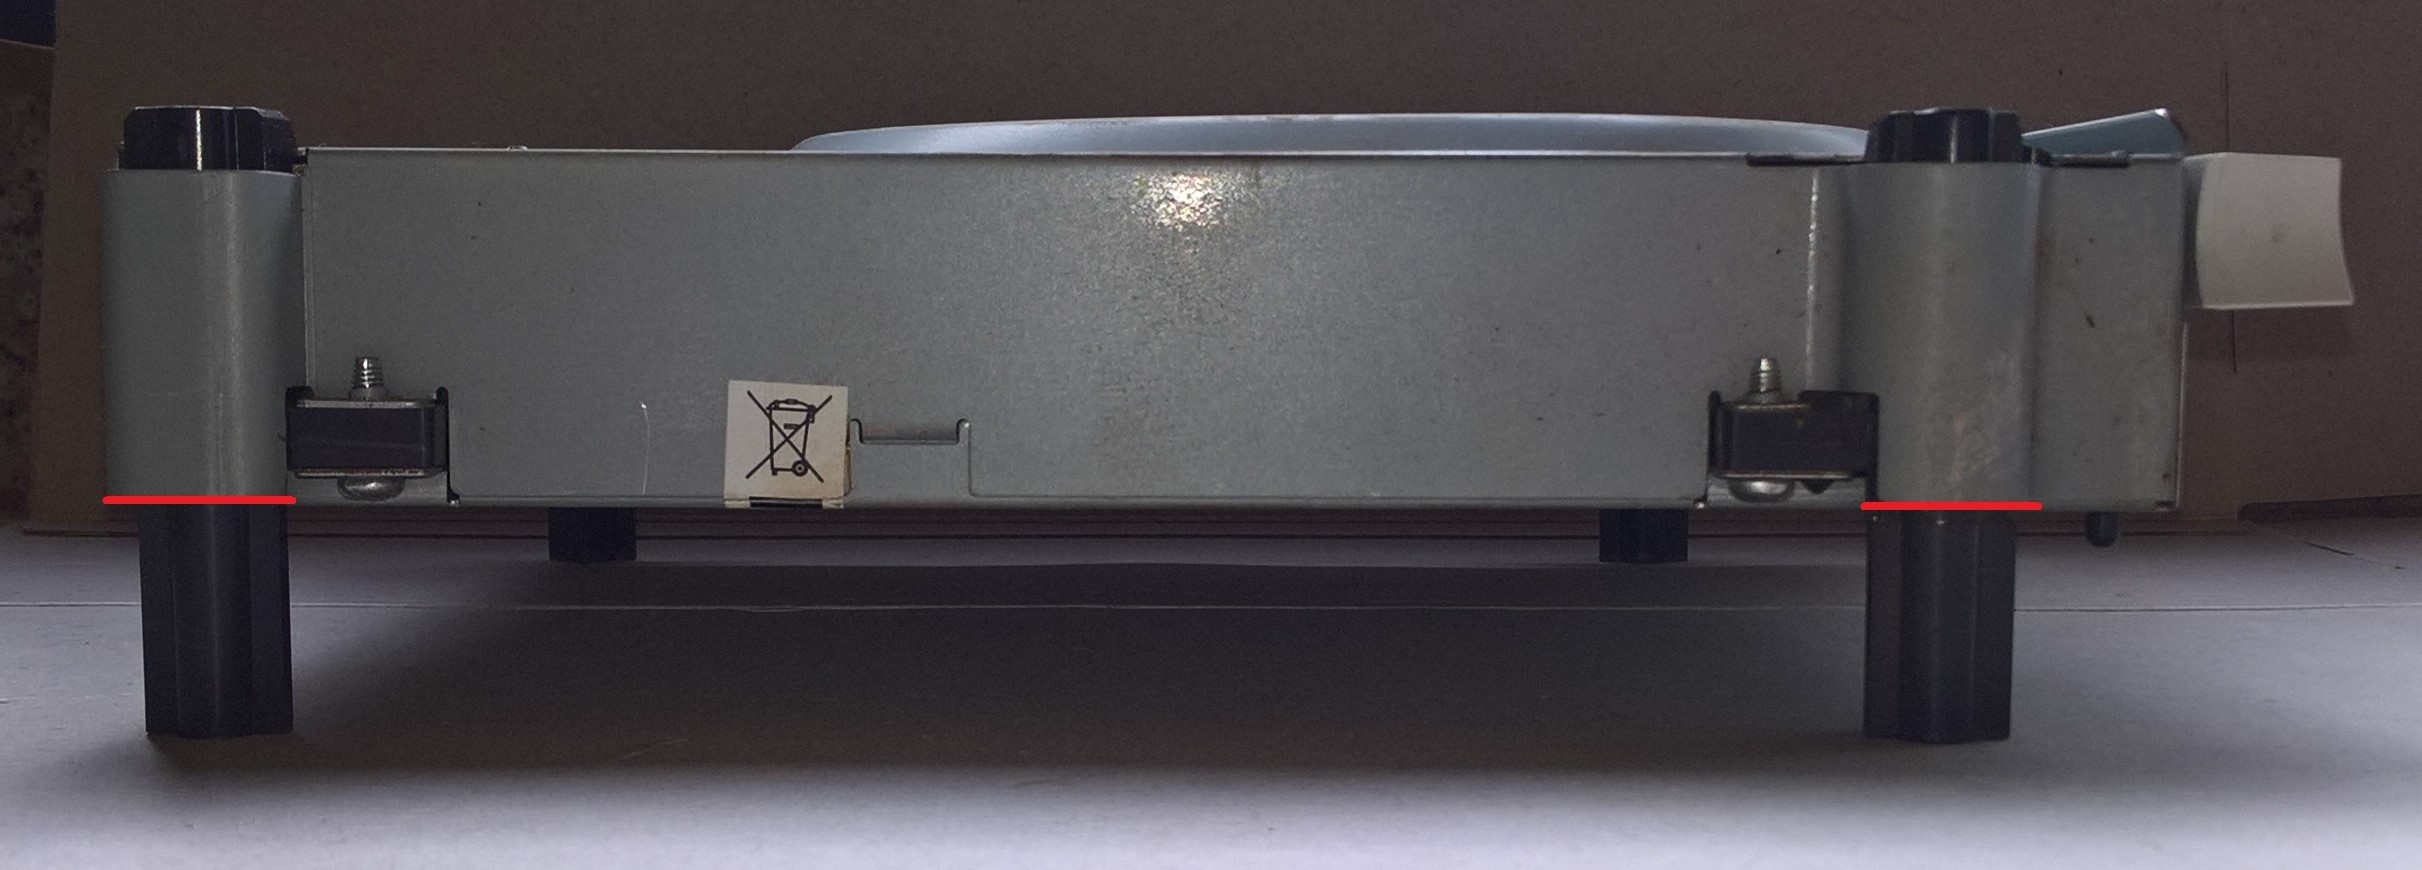
Modifications:
All that is required to make the Xbox 360 disc drive fit perfectly into the HD-DVD enclosure the plastic legs need to be removed. After that modification the disc drive will sit perfectly where the HD-DVD drive sat. As pictured any of the plastic legs below the red needs line to go.
Drive Tray Facia:
To make the HD-DVD drive tray facia fit on the Xbox 360 Lite-On disc dive a piece of the tray that sticks out must be removed so that the drive front around that area is flat. As seen outlined in red in the following pictures.
Before.

After.

Before.

After.

XBOX 360 HD-DVD DRIVE:
Modifications:
No permanent modifications are required on the actual HD-DVD drive enclosure.
Adapter PCB:
I will be replacing the HD-DVD drive USB connectors with a custom made PCB that I designed which will have the eject / fan / LED connector, drive SATA ports and power connectors. Without modifying the HD-DVD drive the PCB will have 2mm spacers between it and the HD-DVD plastic mounting screw locations which stops the PCBs SATA port colliding with the black metal frame.


NOTE: Without modifying the HD-DVD Drive the rear external power and SATA ports will be recessed a bit but they are still easily accessible from my experience
External to Internal Cables:
The cables used inside the HD-DVD enclosure include the Xbox 360 drive SATA and power cable. The Xbox 360 drive power cable had to be rewired to suite my needs.
Powering:
I'll just run the power directly from the Xbox 360 with the extended 20 inch disc drive power cable I've got.
Eject and LED:
The original HD-DVD drive eject and LED circuit board remains in place but I've added an LED to above the eject button then have run wires from the LED legs and eject button solder points back to my custom made circuit board.

Replace the Capacitor:
While your inside the HD-DVD drive enclosure take the time to replace the largest capacitor on the power board before it fails and ruins the PCB. The capacitor is yellow and green and is manufactured by SANYO and is rated as 16V 1500uF. I've got ten HD-DVD drives and nine contained that exact capacitor. Of those nine eight were bulging and/or leaking, the ninth I replaced anyway before it could fail. The tenth was still OK and different coloured so I assume it to be from a different manufacturer so should be OK.

EXTERNAL CABLES
Are an ESATA to regular SATA end cable and a 20 inch extended disc drive power cable. See the following for eBay item auction details for the disc drive power cable.
Ebay Item.- Auction is for Xbox One cause its cheaper than the Xbox 360 auction and also contains the required 11th wire.

The cables used inside the HD-DVD enclosure include the Xbox 360 drive SATA and power cable. The Xbox 360 drive power cable had to be rewired to suite my needs.
Powering:
I'll just run the power directly from the Xbox 360 with the extended 20 inch disc drive power cable I've got.
Eject and LED:
The original HD-DVD drive eject and LED circuit board remains in place but I've added an LED to above the eject button then have run wires from the LED legs and eject button solder points back to my custom made circuit board.

Replace the Capacitor:
While your inside the HD-DVD drive enclosure take the time to replace the largest capacitor on the power board before it fails and ruins the PCB. The capacitor is yellow and green and is manufactured by SANYO and is rated as 16V 1500uF. I've got ten HD-DVD drives and nine contained that exact capacitor. Of those nine eight were bulging and/or leaking, the ninth I replaced anyway before it could fail. The tenth was still OK and different coloured so I assume it to be from a different manufacturer so should be OK.

EXTERNAL CABLES
Are an ESATA to regular SATA end cable and a 20 inch extended disc drive power cable. See the following for eBay item auction details for the disc drive power cable.
eBay seller ocean515732.
eBay seller store.Ebay Item.- Auction is for Xbox One cause its cheaper than the Xbox 360 auction and also contains the required 11th wire.

PICTURES

End...